

-Toby’s Estate (Australia)
But first—how to make a good cup of Joe?

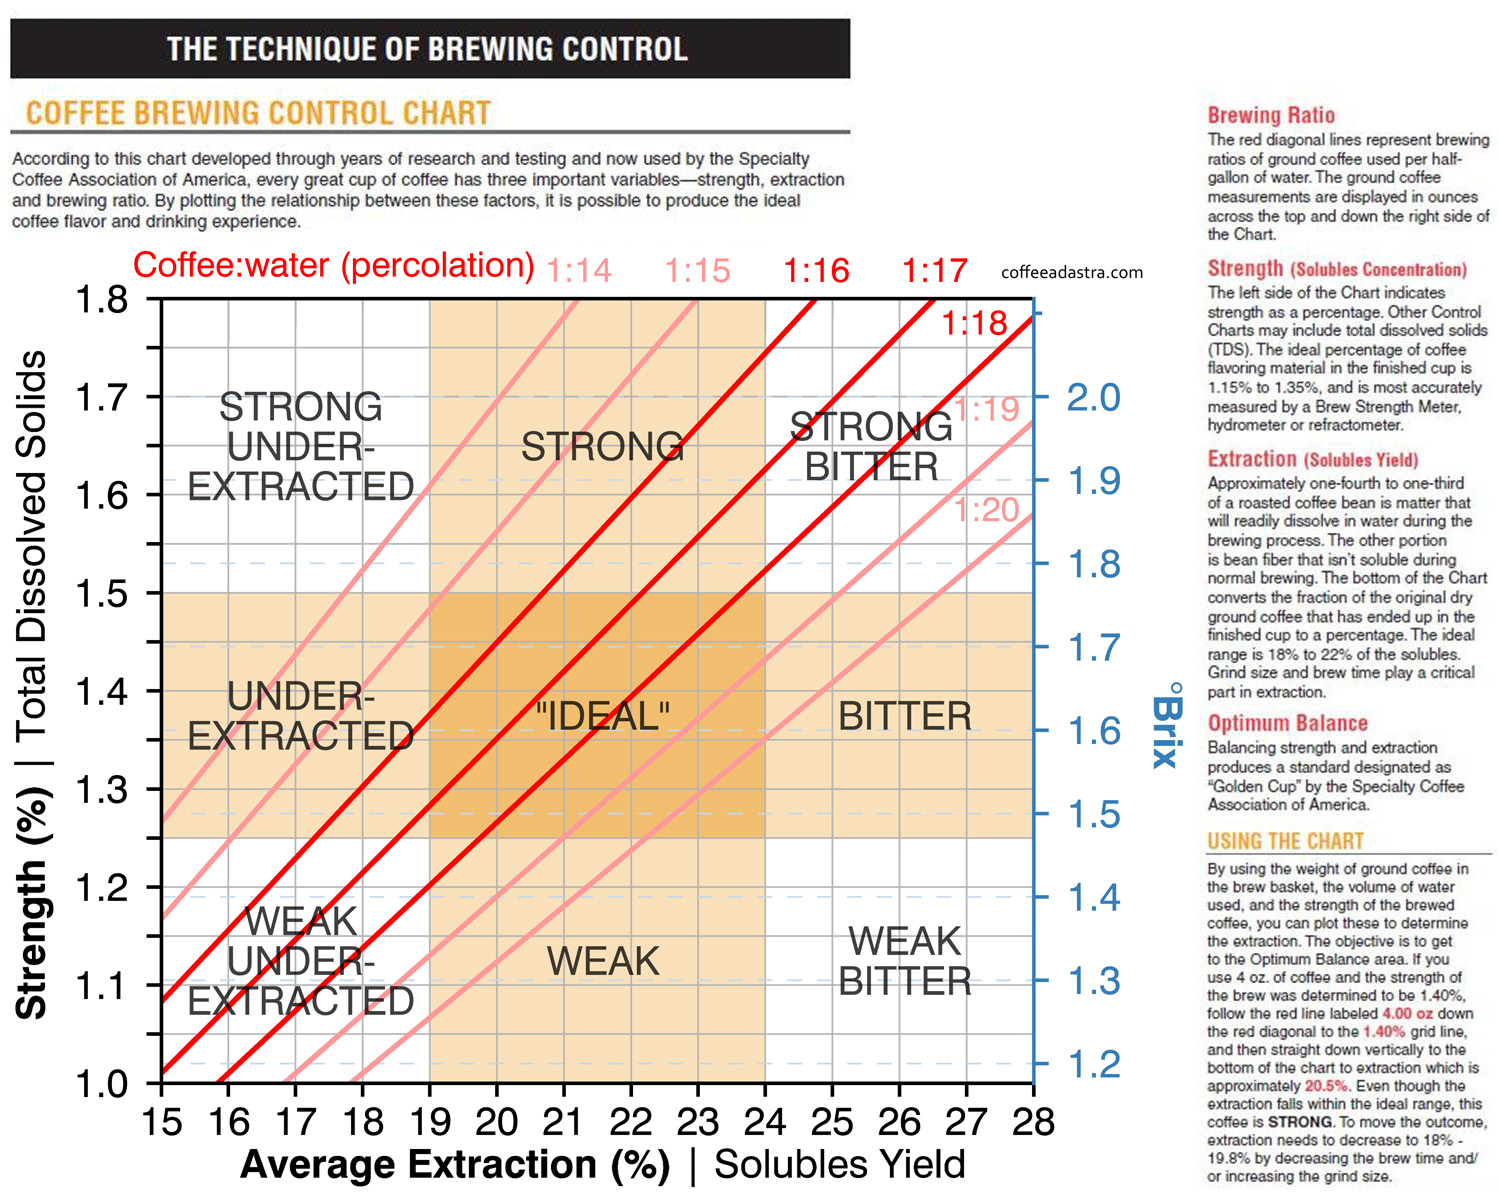
If you extract too little, you have an “undeveloped” cup, which is typically sour and thin. If you extract too much, the coffee becomes bitter.
The diagonal red lines are each for a brewing ratio, which is the actual ratio of coffee beans to water. The lines are diagonal because as you brew longer, or hotter, both strength and extraction of the coffee increase. You control these variables independently by choosing different brewing ratios.
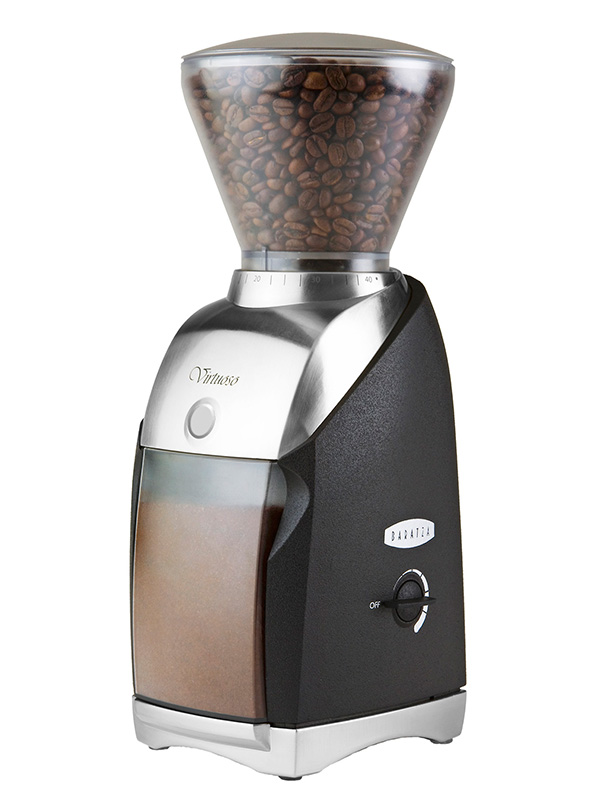
The chart does not address the specific factors that determine extraction, which are time, temperature, and grind size. Time and grind size are bound together; the coarser the grind, the more time you need to get to a particular level of extraction. Many coffee making methods determine the general grind size. Press pots require a coarse grind (and so a long brew time) otherwise you’ll clog the filter. Espresso requires a very fine and consistent grind. Drip and pourover coffees cede the control of time to gravity and physics, so you have to find a grind size that works with the time you’re given. See notes on grinding, below.
Temperature is also critical. It affects extraction rate, but does not affect all flavor compounds equally. So brewing temperature is an important variable for adjusting the flavor balance. The generally accepted range of brewing temperatures is 90°C–96°C / 195–205°F.
A Coffee Recipe
Finally, Coffee Ice Cream
Some of the challenges:
- The taste and aroma compounds in coffee have different levels of solubility in fats than in water. So the time / temperature / concentration guidelines that make the best coffee are not identical for ice cream
- All brewing times / temperatures capable of extracting aromatics, fruity acids, and midrange roasted flavors into milk and cream also extract too much bitterness, possibly because of high carbon dioxide solubility
- The aromatics in coffee are both muted by dairy and prone to evaporation during brewing and cooking
- A lowfat base recipe, with milkfat around 10–11%
- Less than the usual amount of sugar. Also 10–11%
- A low proportion of eggs (2 yolks per liter), typical of most of my recipes
- Additional nonfat milk solids, to preserve the full body of the ice cream
- A high proportion of fresh-ground, high-quality, light-to-medium roast coffee (double the concentration used for brewed coffee in the method above)
- A higher brew temperature, to increase extraction and help balance flavors
- A modified brew method, in which the coffee and hot dairy are bloomed, then sealed in a ziploc bag while brewing, and chilled in ice water before straining, in order to preserve the aromatics
- Added salt, to temper bitterness
- Added acid, in the form of Pedro Ximenez sherry vinegar, to restore the balance of fruity acidity
- Additional milk and cream, to compensate for what will be thrown out with the coffee grounds
Recipe: Underbelly Coffee Ice Cream
*Use good quality milk and cream. Nothing ultrapasteurized. Low-temperature pasteurized is ideal. Homogenized products will give best texture. Avoid cream with added stabilizer (unknown variables). Dry milk must be 100% skim milk solids, processed without high heat. There should be no off odors either when it’s dry or when it’s mixed. Store sealed in freezer.
**Or substitute 5g fructose powder, and add an additional 5g dextrose.
Experiment notes on coffee extraction methods:
-Commercial or homemade coffee extract, made with alcohol: basic coffee, roast, and bitter flavors. Flat. Little fruit or liveliness or lighter aromatics.
-“Instant” infusion into alcohol, made with whipping siphon and nitrous oxide: similar to conventional extract, but more mid-rangey and less bitter.
-Coffee infused into water, brewed as very strong coffee (typically press-pot style) and strained. Extra water compensated for by balancing recipe and adding milk solids: typical ice cream shop coffee ice cream flavors, emphasizing roast and base coffee notes. Bright flavors and aromas muted.
-Coffee mixed into simmered milk or cream, brewed as it cools, for 10 to 30 minutes: standard coffee ice cream flavor. Fairly flat. Slighty bitter and overextracted tasting when brewed strong. Little fruit or aroma.
-Coffee brewed into ice cream mix in sous-vide bag as mix cooks, at 75°C for 45 minutes: Prominent fruit and aromatic flavors, but a strong, metallic and bitter imballance.
-Coffee cold brewed into dairy overnight in fridge: Very weak relative to amount of coffee used. No bitterness, and likewise no acidity or aromatics. All midrange. Similar to instant coffee.
-Coffee brewed with dairy in sealed bag, then chilled in bag before straining (similar to Japanese iced coffee method). 75°C, 4 to 7 minutes: Good aromatics and acidity. Midrange flavors undeveloped. Metalic and bitter flavors are out of balance.
-Coffee brewed with dairy in sealed bag, then chilled in bag before straining. 93°C to 95°C, 4 to 7 minutes: Fairly well developed coffee flavors, including aromatics and acidity. Metalic and bitter flavors still somewhat present and out of balance.
-Coffee brewed with dairy in sealed bag, then chilled in bag before straining. 96°C, 4 to 5 minutes: Fuller range, 3-dimensional, better balanced flavor. Still too much metalic and bitter flavor.
-Coffee brewed with dairy in sealed bag, then chilled in bag before straining. 96°C, 3 minutes: Full range, 3-dimensional, well balanced. Only slight remaining metallic / bitter notes. Brought mostly into balance by adjusting salt and acidity.
nice writing…
Thank you!
Superb work, found some cool and unique recipe.They way you have presented it, looks like it's easy to make.
If this is your idea of easy, more power to you!
Espresso drinking is a consistent practice in relatively every culture. Individuals adore different tastes of espresso from exceptionally solid to light espresso. french press coffee to water ratio
Hi Baird, thanks for the link. That’s a pretty good summary of press pot technique; it’s pretty close to what’s posted above. Anytime someone tells you an ideal coffee to water ratio (me included) it’s worth considering as a starting point. It’s ultimately going to be decided by your taste buds and the qualities of the particular coffee beans.
Re: espresso, yeah, there are many tastes. I gotta say, though, after discovering the things a great roaster and barista can do with single origin beans, it’s hard not to be convinced that the most exciting and sophisticated espresso possibilities exist right here in the 3rd (or is it 4th now?) wave. When you have world-class coffee beans from one farm or collective, roasted perfectly to preserve their origin character, and extracted by a barista who knows how to do it … it’s a whole new world. You taste all the coffee. In comparison, Southern Italian style espresso tastes rather one-note.
Ok, I made another batch and included the blooming step. It's a major improvement. The recipe now reflects this change. The flavor still has a slight metalic / bitter imbalance when the ice cream is freshly mixed, but this dissipates very quickly. After hardening, the flavors are now even better balanced and full.
The origin quality of the coffee really comes through with this method, augmented only slightly by the sherry vinegar, and by caramel flavors (not sure where those are coming from … possibly from the roast profile of the coffee itself).
I'd suggest brewing a batch of press pot coffee with your beans to make sure you love their flavors before committing to ice cream, because those are the flavors you'll get (with a somewhat different balance). I've made this now with Toby's Estate Rwanda Bumbogo and Stumptown Ethiopia Duromina. I greatly preferred the full flavors and the assertive fruitiness of the Ethiopian.
Hey Underbelly, I finally tried this recipe used JBC roasters Ethiopia (love this). Out of the blender the mix didn't taste good, kind of thin and bunt like bad office coffee but strong. I went ahead and froze it anyway. Out of the ice cream machine it tasted a little better, but after it hardened in the freezer a few hours holy s***t this is the best coffee ice cream I ever had. What's up with the flavor? Why does it start out bad and then get so good? Am I just a freak?
It is possible that you’re a freak. As a fellow freak, I notice the same thing. The flavor seems to balance and fill out as the ice cream is frozen, and to continue improving as it hardens. At first I suspected the ice cream needed to be cold enough for the flavors to taste balanced, but this doesn’t seem to be the issue. After the flavor develops properly, it still tastes good when warmed up and softened.
I now suspect the phenomenon might be related to carbon dioxide. The fresher the coffee beans are when you grind them, the more full of CO2 they are. This is why the grounds foam up (“bloom”) when you first wet them. When CO2 goes into solution in the coffee (or ice cream) it forms carbonic acid, which a bit metalic and astringent tasting. It’s why flat seltzer doesn’t taste like plain water, at least for a while. Maybe this infusion method forms a lot of carbonic acid in the ice cream—and maybe the acid is unstable enough that it breaks down, releasing the CO2 over time. I don’t know where it goes when the ice cream is in plastic containers … possibly just into the foam structure of the ice cream. I’m just riffing here.
The coffee cognoscenti tell you not to brew with beans that are too freshly roasted—depending on many variables, C02 levels usually drop off to reasonable levels 2 to 7 days after roasting. Even then there’s enough C02 to warrant a blooming step in the brewing process, to vent excess CO2 before adding the full volume of water. In espresso making, this takes the form of a low-pressure pre-infusion.
It may make sense to add a blooming step to the ice cream recipe. I’m going to try this on my next batch. The change would be to add just enough of the hot dairy to saturate the coffee grounds, and let them sit, with the bag open, for about 30 seconds. Then add the rest of the dairy, evacuate the air, seal the bag, and agitate for the remaining 2-1/2 minutes.
I’ll let you know how it goes. Meanwhile, if anyone experiments with this, please share your results.
Why couldn't you use espresso?
Hi Anon, thanks for writing.
You certainly could experiment with espresso. It’s water-based, so you’d want to compensate for the added water with extra nonfat milk solids. The bigger issue is you’d need an espresso machine. Ones that make decent espresso cost in the thousands of dollars, and the process takes longer to master than making ice cream. A good enough grinder costs many hundreds to well over a thousand. And the countertop real estate is substantial.
If you’ve already gone down this rabbit hole, then by all means experiment. And let us know what you discover.
Otherwise, the choice would be trekking back from the local café with half a dozen go-cups every time you want to make coffee ice cream.
One has to draw the line somewhere; I draw it somewhere before that.
If we’re in the boat of already having an espresso setup, any advice on how much brewed espresso (in ml or grams) to use and perhaps a bit more info on how to calculate how much additional MSNF would be needed? Please and thank you! 🙂
“Drop circulator temperature to 75°C / 167°F”
This seems to be a typo because temperature from previous step is also 75°C
Hi Luan, thanks for writing. That was indeed a typo. Moreover, I’ve changed that whole section of the recipe to reflect my current recommendations on time/temperature. It now calls for 77°C for 45 minutes, with no temperature change.
Nice! I have 2 follow up questions though:
– does 45 minutes includes the warming up time or time since the water bath reach 77oC?
– do you use 77oC in all of your recipe or just for coffee? I recall seeing 75oC + 30 mins in multiple article of yours.
Just wanted to stop and say thank you for writing all of this! I’ve been reading through your blogs today and it has has given me answers/ideas to the things I’ve been having trouble with in such a clear and thorough way I haven’t seen anywhere else. Can’t wait to start experimenting with all this new knowledge!
Hello Paul!
In my country (Vietnam), I can find only one kind of carrageenan which is used for sausages. I wonder how to check what kind it is because the recipe requires lambada.
If it forms a gel with milk (or anything that has calcium in it) you’ll know it’s iota or kappa. Test by mixing a bit into a few ounces of milk, heating to a simmer, and letting it cool. Chill in the refrigerator. See if a gel forms.
Lambda will thicken the milk but won’t gel. If you have kappa or iota, you can use it; just try using much less. Maybe try 0.2g instead of 1g.
Discovering this recipe a few weeks ago I appreciated the way you replicated pour-over brewing complete with a low volume bloom, appropriate temperatures, and consideration for over-brewing by shock cooling the mix after the brew duration transpired.
I finally got my shipment of stablisers and approached this recipe and I tell you that although I understood the steps individually Icertainly underestimated the time and effort to execute all of them in succession, it’s intensive for sure! I didn’t have Pedro Ximenez so opted to add 0.3g of citric acid and was terrified I’d ruined the batch once I tasted it pre-pasteurising. However, it tempered down by the end although it did push the acidity a little too far but I like my filter coffee on that end anyway.
The aromatics of the beans are faithfully captured in the result as I’d hoped! I’ll definitely be making a few batches with different beans. My GF is a Q Arabica Grader so I’m really excited to learn on her knowledge and experience so that I’ll be able to push the boat out with high quality and more obscure beans now that I understand the process here. It definitely pays off!
I’ll probably approach a cold-brew sorbet at some point and trial your stabliser ratio for those as well.
Thank you so much!